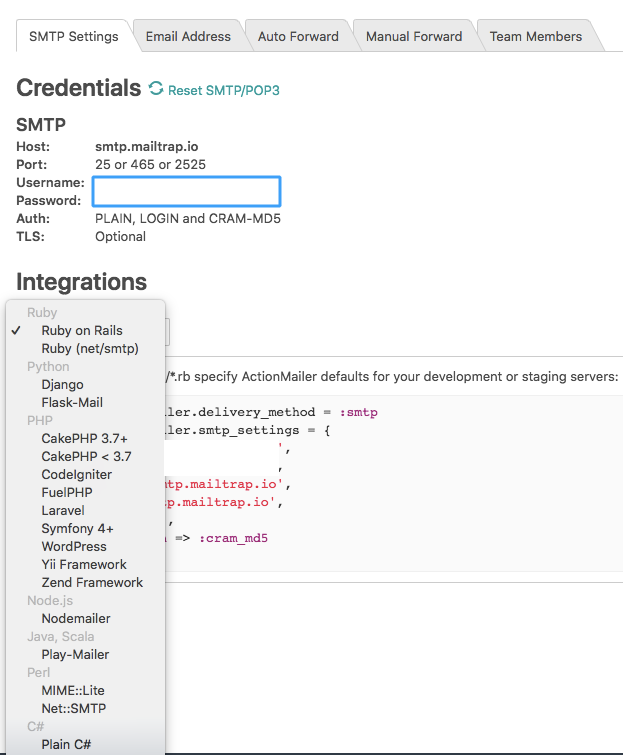
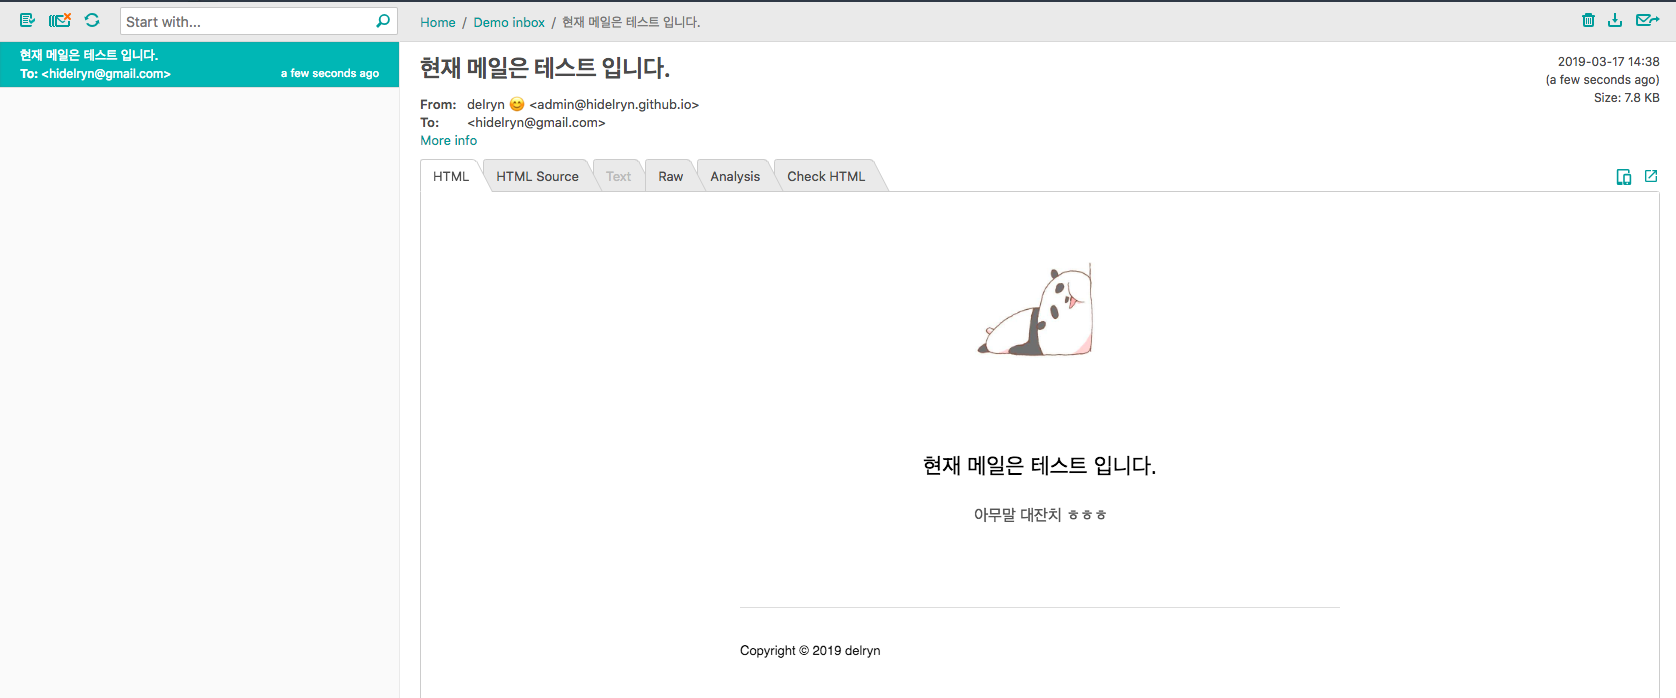
1
2
3
4
5
6
7
8
9
10
11
12
13
14
15
16
17
18
19
20
21
22
23
24
25
26
27
28
29
30
31
32
33
34
35
36
37
38
39
40
41
42
43
44
45
46
47
48
49
50
51
52
53
54
55
56
57
58
59
60
61
62
63
64
65
66
67
68
69
70
71
72
73
74
75
76
77
78
79
80
81
82
83
84
85
86
87
88
89
90
91
92
93
94
95
96
97
98
99
100
101
102
103
104
105
106
107
108
109
110
111
112
113
114
115
116
117
118
119
120
121
122
123
124
125
126
127
128
129
130
131
132
133
134
135
136
137
138
139
140
141
142
143
144
145
146
147
148
149
150
151
152
153
154
155
156
157
158
159
160
161
162
163
164
165
166
167
168
169
170
171
172
173
174
175
176
177
178
179
180
181
182
183
184
185
186
187
188
189
190
191
192
193
194
195
196
197
198
199
200
201
202
203
204
205
206
207
208
209
210
211
212
213
214
215
216
217
218
219
220
221
222
223
224
225
226
227
| const nodemailer = require('nodemailer');
const transporter = nodemailer.createTransport({
host: 'smtp.mailtrap.io',
port: 2525,
secure: false,
auth: {
user: '발급 받은 Username',
pass: '발급 받은 Password',
},
});
const title = `현재 메일은 테스트 입니다.`
const contents = `아무말 대잔치 ㅎㅎㅎ`;
const html = `
<!doctype html>
<html>
<head>
<meta http-equiv="Content-Type" content="text/html; charset=utf-8" />
<meta name="viewport" content="width=device-width, initial-scale=1.0"/>
<title>안내 메일</title>
<style type="text/css">
#outlook a {padding:0;}
body{width:100% !important; -webkit-text-size-adjust:100%; -ms-text-size-adjust:100%; margin:0; padding:0;}
.ExternalClass {width:100%;}
.ExternalClass, .ExternalClass p, .ExternalClass span, .ExternalClass font, .ExternalClass td, .ExternalClass div {line-height: 100%;}
#backgroundTable {margin:0; padding:0; width:100% !important; line-height: 100% !important;}
img {outline:none; text-decoration:none; -ms-interpolation-mode: bicubic;}
a img {border:none;display:inline-block;}
.image_fix {display:block;}
h1, h2, h3, h4, h5, h6 {color: black !important;}
h1 a, h2 a, h3 a, h4 a, h5 a, h6 a {color: blue !important;}
h1 a:active, h2 a:active, h3 a:active, h4 a:active, h5 a:active, h6 a:active {
color: red !important;
}
h1 a:visited, h2 a:visited, h3 a:visited, h4 a:visited, h5 a:visited, h6 a:visited {
color: purple !important;
}
table td {border-collapse: collapse;}
table { border-collapse:collapse; mso-table-lspace:0pt; mso-table-rspace:0pt; }
a {color: #000;}
@media only screen and (max-device-width: 480px) {
a[href^="tel"], a[href^="sms"] {
text-decoration: none;
color: black; /* or whatever your want */
pointer-events: none;
cursor: default;
}
.mobile_link a[href^="tel"], .mobile_link a[href^="sms"] {
text-decoration: default;
color: orange !important; /* or whatever your want */
pointer-events: auto;
cursor: default;
}
}
@media only screen and (min-device-width: 768px) and (max-device-width: 1024px) {
a[href^="tel"], a[href^="sms"] {
text-decoration: none;
color: blue; /* or whatever your want */
pointer-events: none;
cursor: default;
}
.mobile_link a[href^="tel"], .mobile_link a[href^="sms"] {
text-decoration: default;
color: orange !important;
pointer-events: auto;
cursor: default;
}
}
p {
margin:0;
color:#555;
font-family:Helvetica, Arial, sans-serif;
font-size:16px;
line-height:160%;
}
a.link2{
text-decoration:none;
font-family:Helvetica, Arial, sans-serif;
font-size:16px;
color:#fff;
border-radius:4px;
}
h2{
color:#181818;
font-family:Helvetica, Arial, sans-serif;
font-size:22px;
font-weight: normal;
}
.bgItem{
background:#F4A81C;
}
.bgBody{
background:#ffffff;
}
</style>
</head>
<body>
<!-- Wrapper/Container Table: Use a wrapper table to control the width and the background color consistently of your email. Use this approach instead of setting attributes on the body tag. -->
<table cellpadding="0" width="100%" cellspacing="0" border="0" id="backgroundTable" class='bgBody'>
<tr>
<td>
<!-- Tables are the most common way to format your email consistently. Set your table widths inside cells and in most cases reset cellpadding, cellspacing, and border to zero. Use nested tables as a way to space effectively in your message. -->
<table cellpadding="0" cellspacing="0" border="0" align="center" width="100%" style="border-collapse:collapse;">
<tr>
<td class='movableContentContainer'>
<div class='movableContent'>
<table cellpadding="0" cellspacing="0" border="0" align="center" width="600">
<tr height="40">
<td width="200"> </td>
<td width="200"> </td>
<td width="200"> </td>
</tr>
<tr>
<td width="200" valign="top"> </td>
<td width="200" valign="top" align="center">
<div class="contentEditableContainer contentTextEditable">
<div class="contentEditable" >
<img src="https://avatars1.githubusercontent.com/u/29791348?s=460&v=4" width="155" height='155' alt='Logo'/>
</div>
</div>
</td>
<td width="200" valign="top"> </td>
</tr>
<tr height="25">
<td width="200"> </td>
<td width="200"> </td>
<td width="200"> </td>
</tr>
</table>
</div>
<div class='movableContent'>
<table cellpadding="0" cellspacing="0" border="0" align="center" width="600">
<tr>
<td width="100%" colspan="3" align="center" style="padding-bottom:10px;padding-top:25px;">
<div class="contentEditableContainer contentTextEditable">
<div class="contentEditable" >
<h2 >`+ title + `</h2>
</div>
</div>
</td>
</tr>
<tr>
<td width="100"> </td>
<td width="400" align="center" style="padding-bottom:5px;">
<div class="contentEditableContainer contentTextEditable">
<div class="contentEditable" >
<p >`+ contents + `</p>
</div>
</div>
</td>
<td width="100"> </td>
</tr>
</table>
</div>
<div class='movableContent'>
<table cellpadding="0" cellspacing="0" border="0" align="center" width="600">
<tr>
<td width="100%" colspan="2" style="padding-top:65px;">
<hr style="height:1px;border:none;color:#333;background-color:#ddd;" />
</td>
</tr>
<tr>
<td width="60%" height="70" valign="middle" style="padding-bottom:20px;">
<div class="contentEditableContainer contentTextEditable">
<div class="contentEditable" >
<span style="font-size:13px;color:#181818;font-family:Helvetica, Arial, sans-serif;line-height:200%;">Copyright © 2019 delryn</span>
</div>
</div>
</td>
</tr>
</table>
</div>
</td>
</tr>
</table>
<!-- END BODY -->
</td>
</tr>
</table>
<!-- End of wrapper table -->
</body>
</html>
`
const mailOptions = {
from: '"delryn 😊" <admin@hidelryn.github.io>',
to: "hidelryn@gmail.com",
subject: title,
html: html
};
transporter.sendMail(mailOptions, (err, res) => {
if (err) {
console.log(err);
} else {
console.log(res);
}
transporter.close();
});
|


