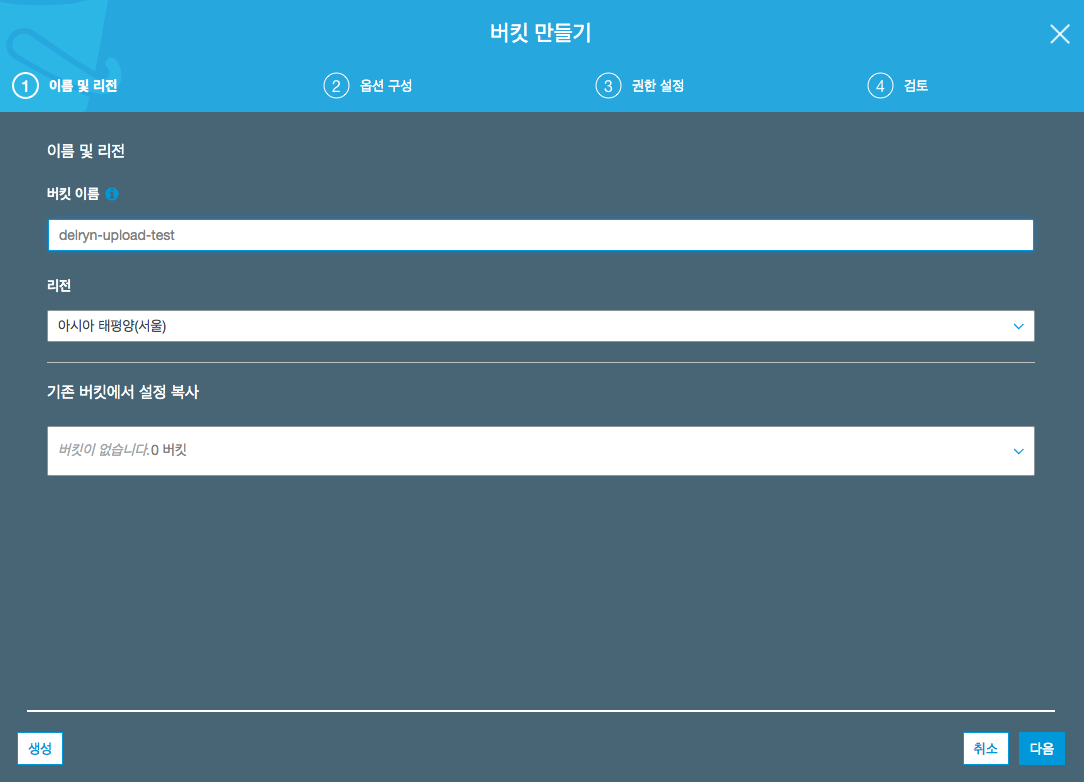
s3 버켓 생성
s3 설정
IAM key로 하려면 설정을 좀 해야 한다.

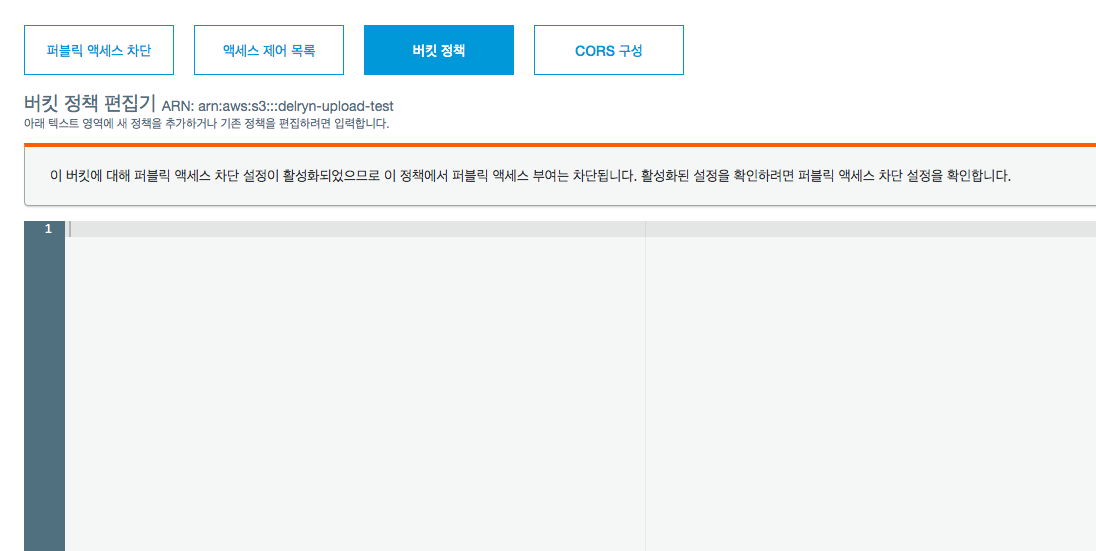
ARN: 이후 내용을 복사 한다음에 정책 생성기를 누른다.
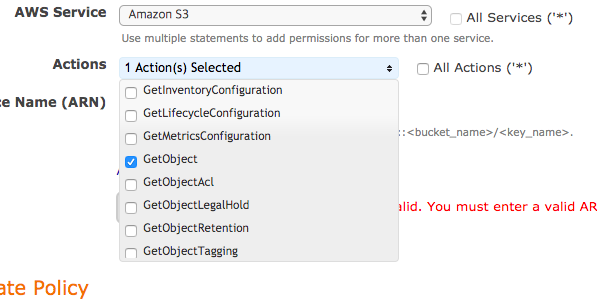
서비스는 당연히 s3이고 액션은 getObject만 한다 (읽기만 가능)
그리고 아까 복사해둔 ARN내용을 기입후 Add Stagement 노란 박스를 눌러 준다.
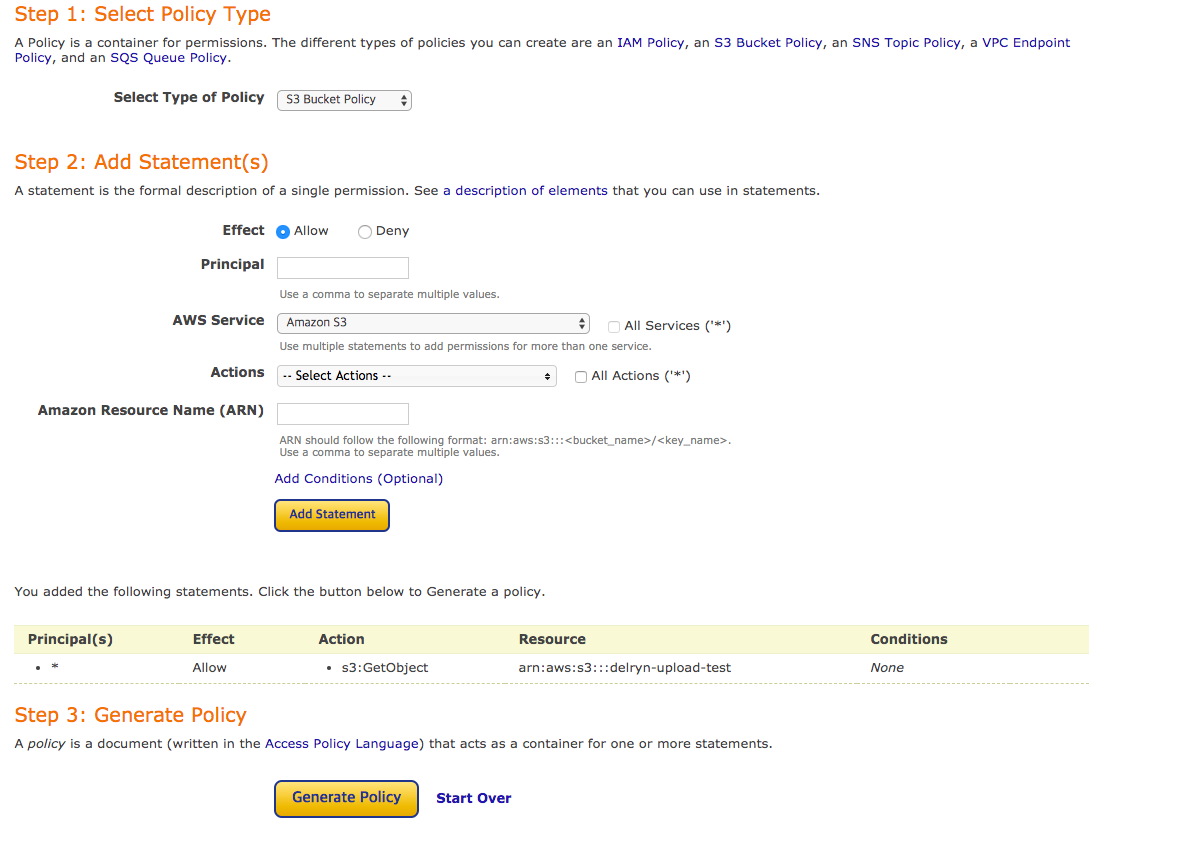
Generate Policy 버튼을 클릭
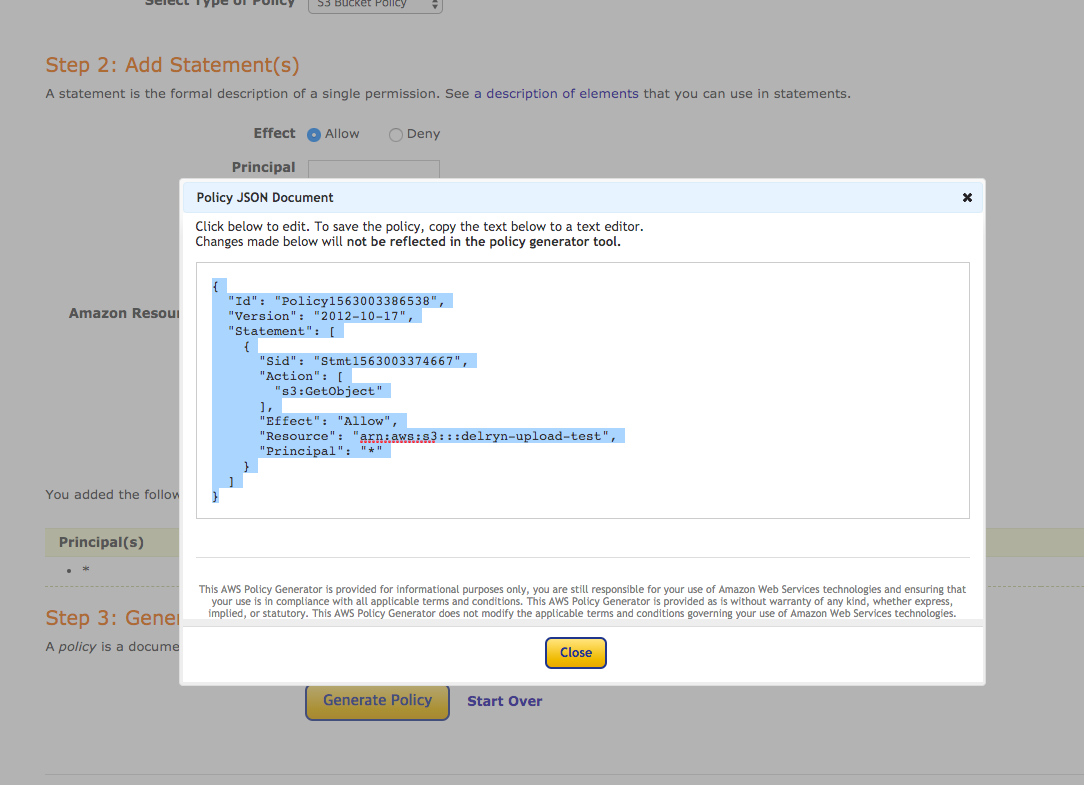
복사 해서 s3 버킷 정책 편집기에 붙여넣기 하면 된다.
붙여넣기 하고 나서 꼭 Resource 뒤에 /*를 붙여준다. 저장 하면 설정 끝
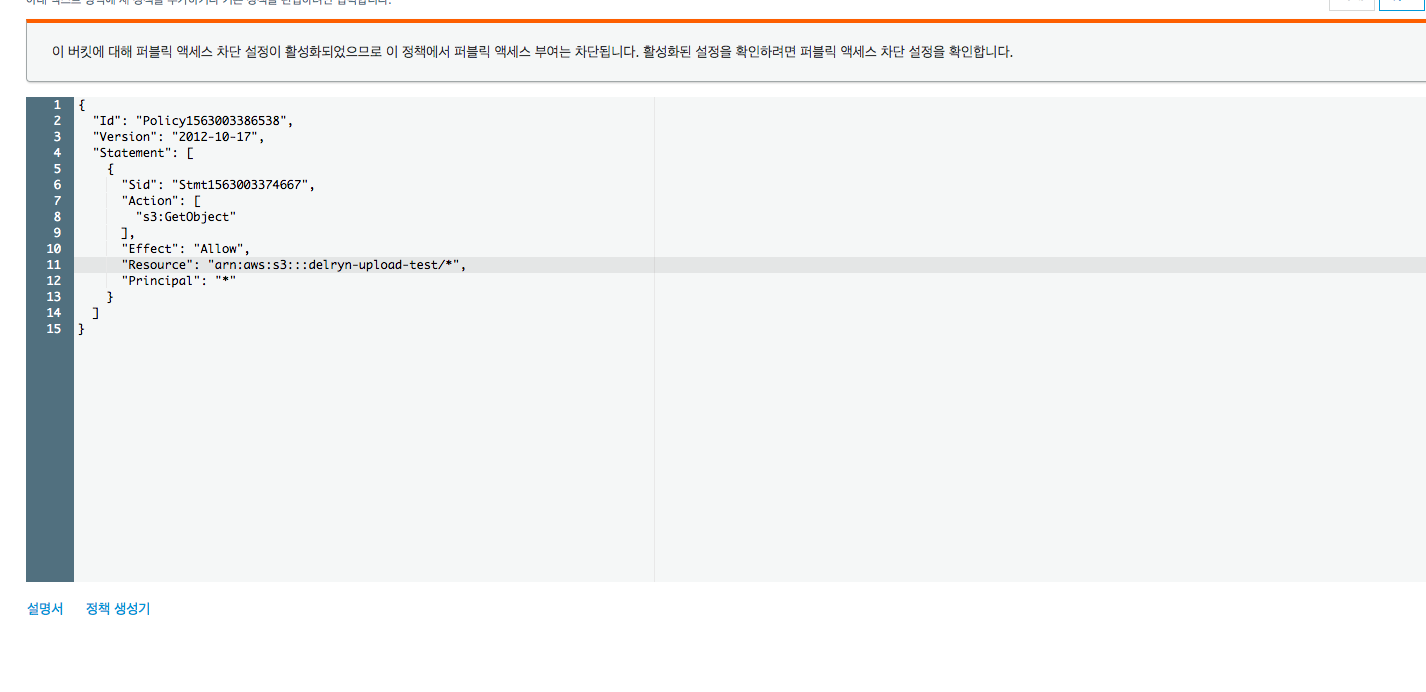
json 업로드
1
2
3
4
5
6
7
8
9
10
11
12
13
14
15
16
17
18
19
20
21
22
23
24
25
26
27
28
29
30
31
32
33
34
35
36
|
const AWS = require('aws-sdk');
AWS.config.update({
region: '',
accessKeyId: '',
secretAccessKey:''
});
const s3 = new AWS.S3();
const DATA = {
id: 1,
title: '던전에서 만남을 추구하면 안될까 2기',
body: {
start: '2019년 3분기',
develop: 'J.C.STAFF',
broadcast: '도쿄 MX'
}
}
const params = {
Bucket: 'delryn-upload-test',
Key: 'test.json',
ACL: 'public-read',
Body: JSON.stringify(DATA),
ContentType: "application/json"
}
s3.putObject(params, (err) => {
if (err) {
console.log(err);
} else {
console.log('success');
}
});
|

실행하면 잘 올라감.
이미지 올리기
간단하게 multer, multer-s3를 이용하면 된다.
html
1
2
3
4
5
6
7
8
9
10
11
12
13
14
15
16
17
| <!DOCTYPE html>
<html lang="en">
<head>
<meta charset="UTF-8">
<meta name="viewport" content="width=device-width, initial-scale=1.0">
<meta http-equiv="X-UA-Compatible" content="ie=edge">
<title>Document</title>
</head>
<body>
<form action="/form-upload" method="POST" enctype="multipart/form-data">
<input type="file" name="upload1" required>
<input type="submit" value="전송">
</form>
</body>
</html>
|
업로드 코드
1
2
3
4
5
6
7
8
9
10
11
12
13
14
15
16
17
18
19
20
21
22
23
24
25
26
27
28
29
30
31
32
33
34
35
36
37
38
39
40
41
42
43
44
45
46
47
48
49
50
| const express = require('express');
const AWS = require('aws-sdk');
const multer = require('multer');
const multerS3 = require('multer-s3');
const app = express();
AWS.config.update({
region: '',
accessKeyId: '',
secretAccessKey: ''
});
const PORT = process.env.PORT || 3000;
const s3 = new AWS.S3();
app.get('/', (req, res) => {
res.sendFile(__dirname + '/index.html');
});
var upload = multer({
storage: multerS3({
s3: s3,
bucket: 'delryn-upload-test',
metadata: function (req, file, cb) {
cb(null, { fieldName: file.fieldname });
},
key: function (req, file, cb) {
let extension = file.mimetype.split('/')[1];
cb(null, `${Date.now()}.${extension}`);
},
ACL: 'public-read',
contentType: multerS3.AUTO_CONTENT_TYPE
})
});
app.post('/form-upload', upload.single('upload1'), (req, res) => {
res.send('upload success');
});
app.listen(PORT, () => {
console.log(`server listening on port ${PORT}`);
});
|

테스트 해보면 잘 올라간다.


